Creating a Document
Navigating to the Content Creation Page
To create a document, head over to the Content Management Engine Module and you will be taken to the Content section, which displays a table view of all created content.

Image of MaaS menu selections for Content Management Engine Module and Content from the secondary menu.
Creating a New Document
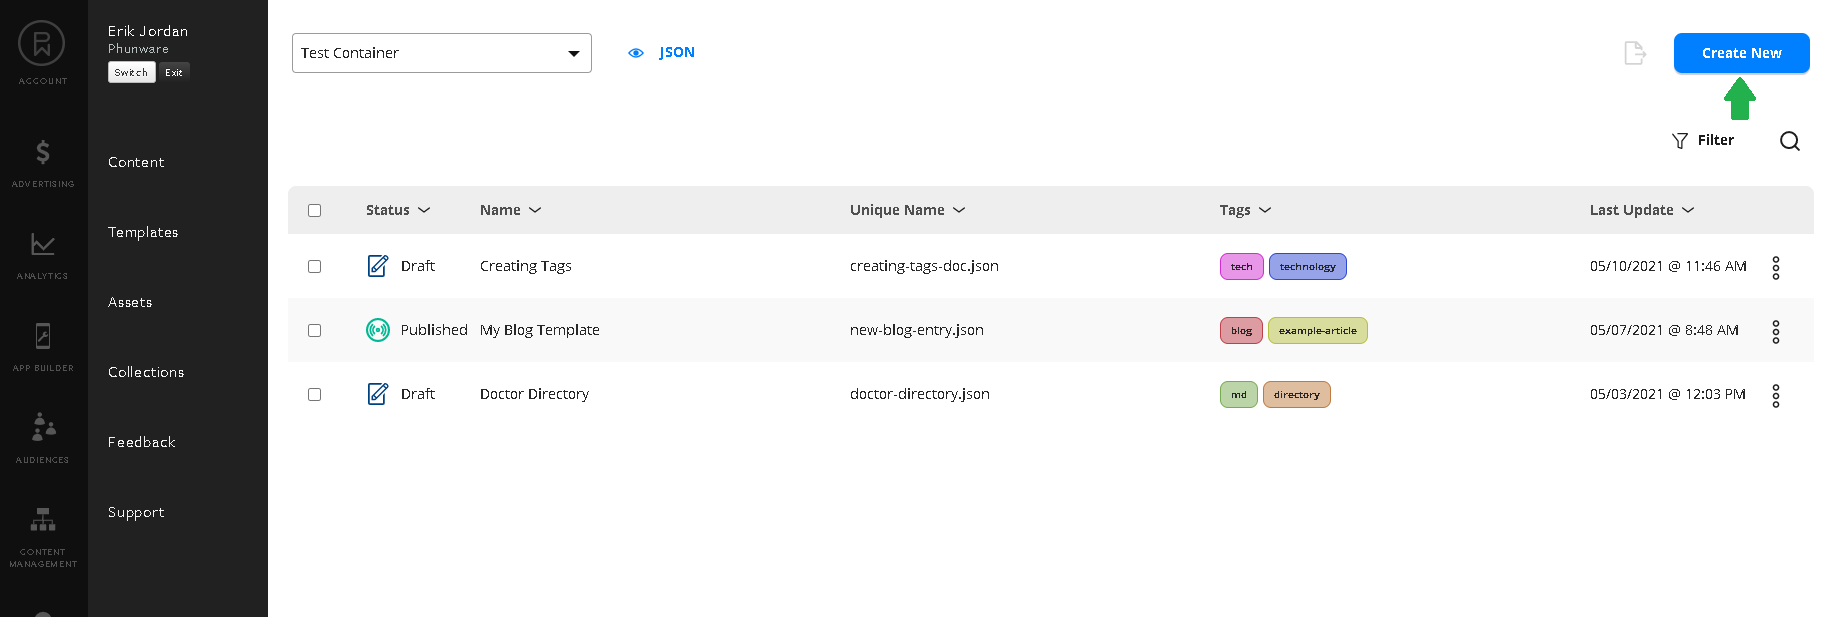
Once in the Content menu, click the blue Create New button on the top right corner of the view to start your document creation.

Image of the Content section of CME, indicating where to select 'Create New'
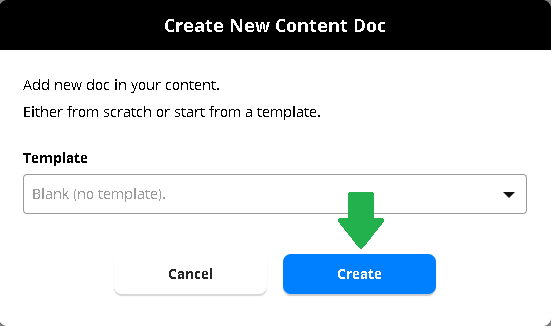
If you have previously created a template, you will see the Create New Content Doc modal, allowing you to select a template to start from. If you do not wish to use a template and create a document from scratch, no selection is necessary and you can select Create to continue.

Image of the Create New Content Doc module depicting where to select Create.
This will bring you to the Content Editor View, with an empty document ready to begin.
Document Fields & Tags
The only requirement for a document to be created is the first field Document Unique Name ; this name is the unique identifier, so be conscious of naming conventions; it will display in the Content List under Unique Name. Once a name is entered, you can save your document and come back to edit at any time.
Document Naming ConventionsLooking for the best way to name your documents? Here are a few examples:
summer-recipes
austin-office-events
nursing-announcements
The second field 'Document Display Name' is optional, and serves as an additional display name you can add to help in identifying the document from the Content List view; this will display under the Display Name column on the table view.
Next, you will be able to add relevant tags to your document. Tags are powerful tools that will enable easy filtering and searching through your documents. Additionally, when engineers integrate with your content, tags will become instrumental when improving payload performance by limiting your queries to just a group of documents for download.
As you begin to type into the tag field, previously created tags will display below. You can select a pre-existing tag, or continue to type in the tag and either select Click to Create a New Tag, or hit enter on the keyboard.
Tagging Examples
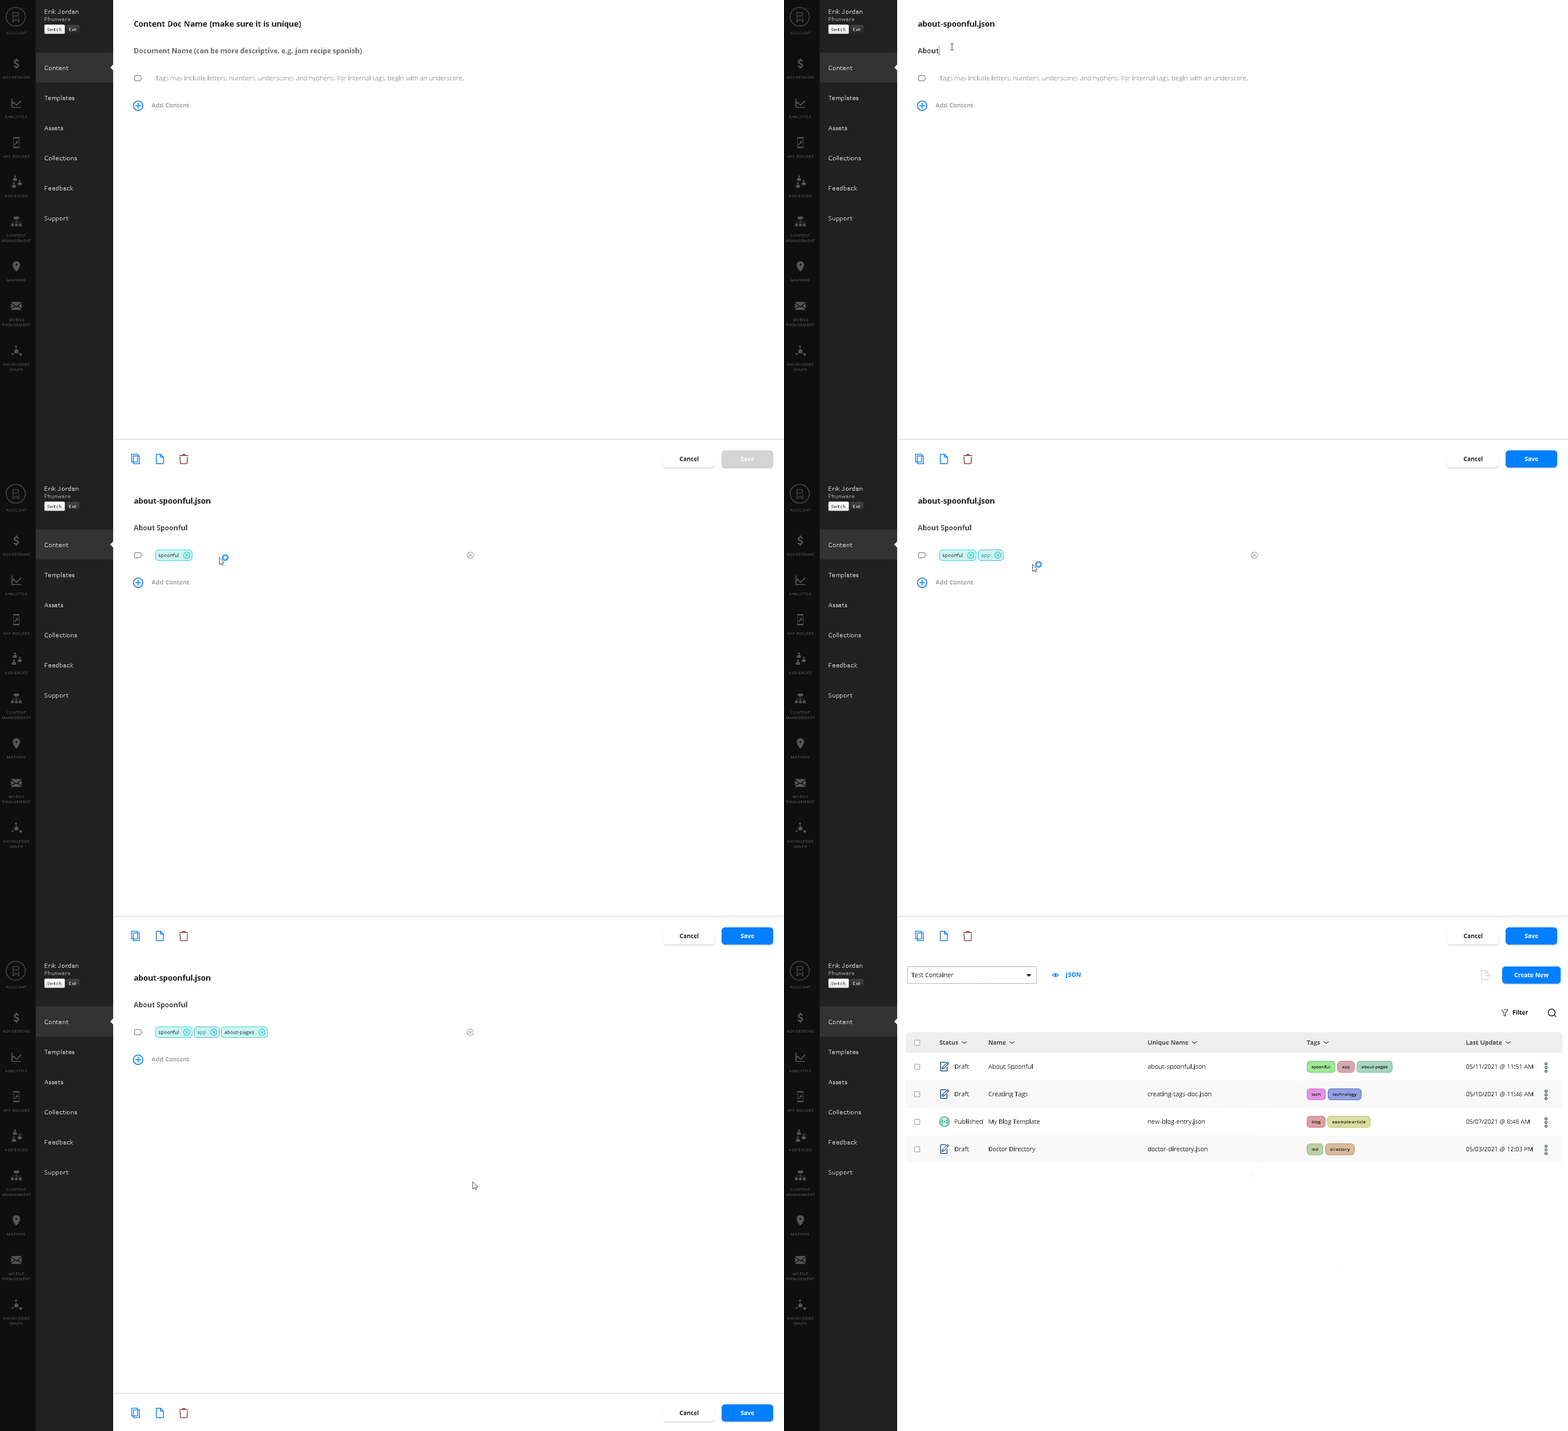
The following animation demonstrates entering in the Document Unique Name, the Document Display Name and adding tags to the document for easy filtering.

Building out Content Structure
Next you can begin adding fields with data as the structure/definition of your document.
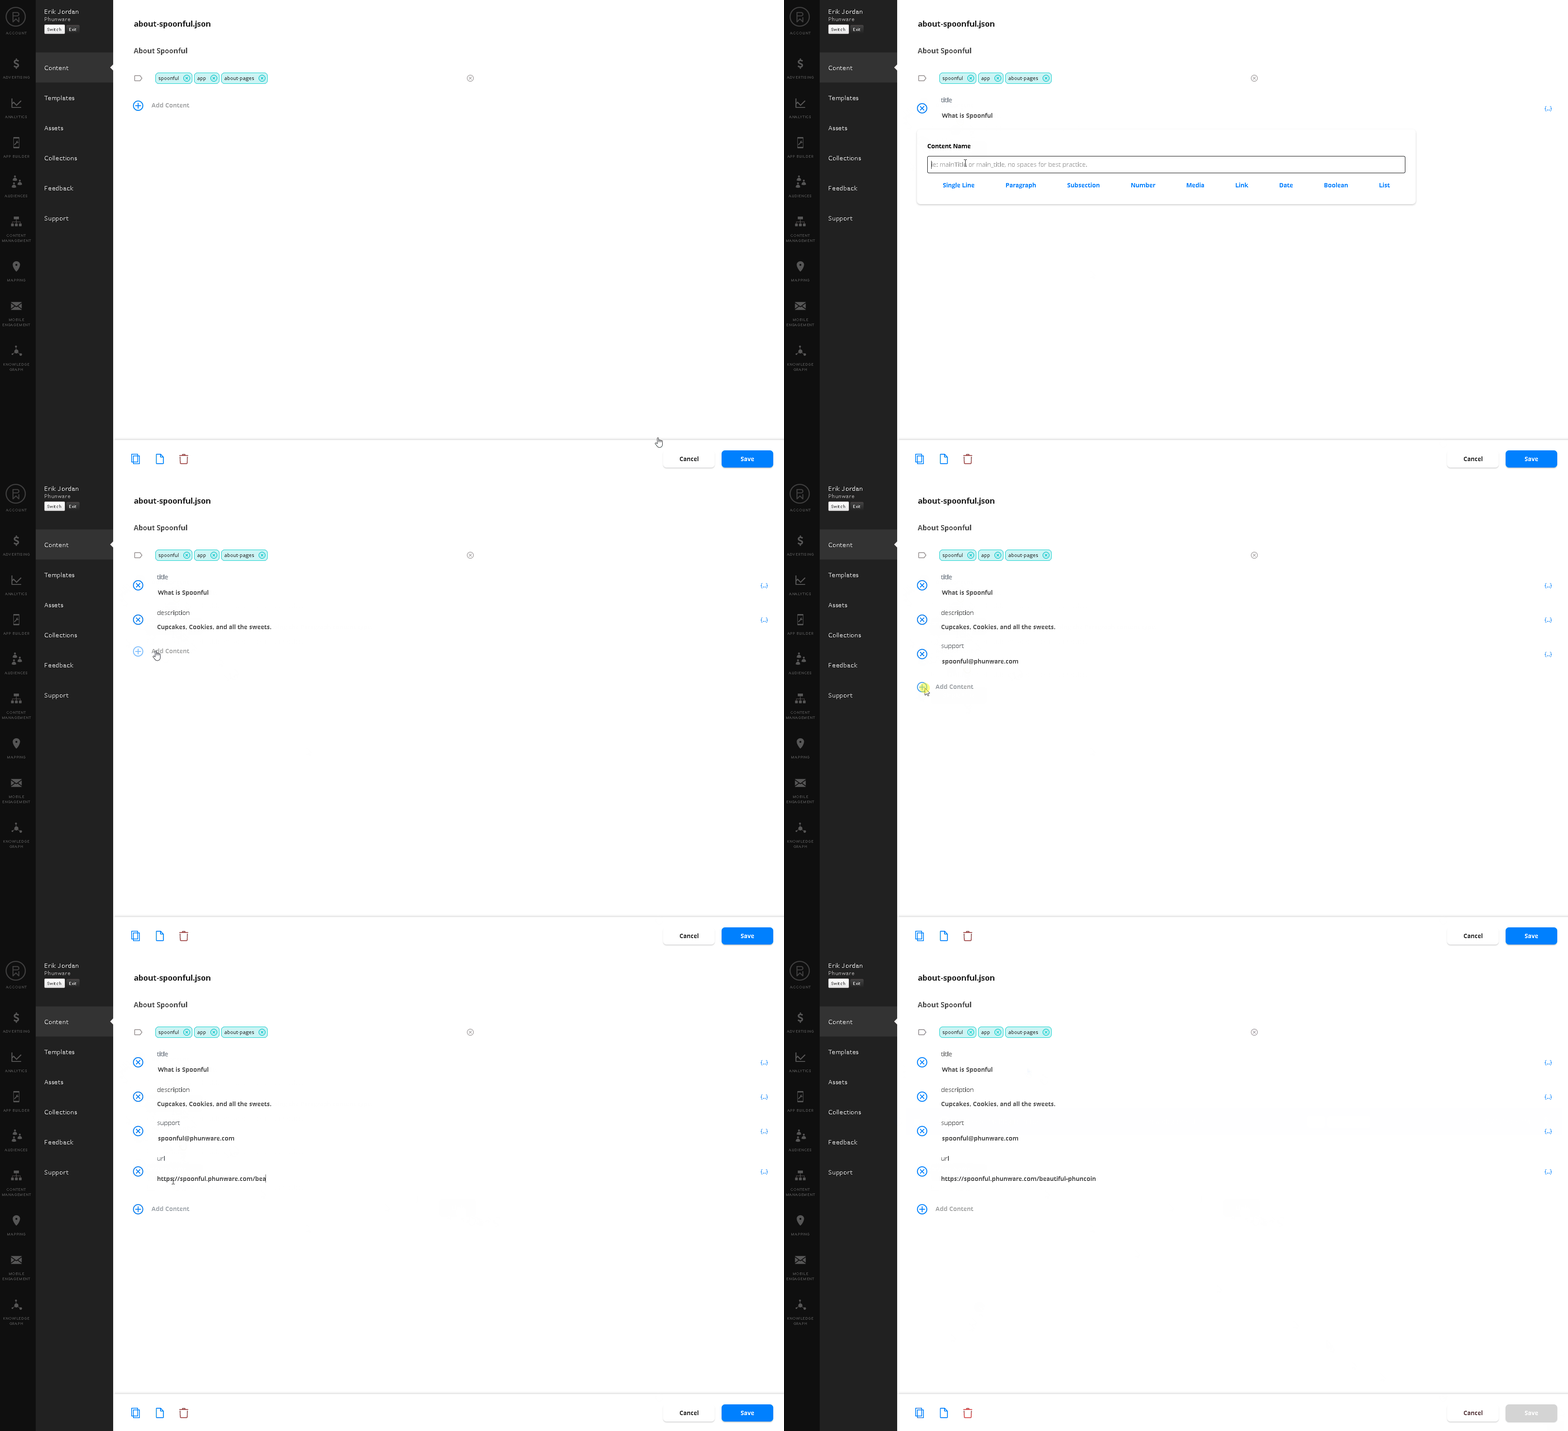
The following animation displays how to add fields, enter in the Content Name, and select the field type to add the new content type to your document. Once added, you can then input data into the new field.

The following JSON document is the end result of the above illustration:
{
	"title": "What is Spoonful",
	"description": "Cupcakes, Cookies, and all the sweets.",
	"support": "[email protected]",
	"url": "https://spoonful.phunware.com/beautiful-phuncoin"
}
Want to learn more about available Content Types?For more detailed information on the Content Types you can add to a document, visit the Content Types page.
Saving the Document
When you have finished with your document creation and content entry, or if you are just done for now, you can select Save in the bottom right of the view to save the document and any content you may have already set up or entered. This will save a draft version of your document.
You are viewing documentation for CME 3.0Looking for CME Classic? For versions prior to 3.0, visit this page for related documentation.
Updated 9 months ago